Feeling that icy bite when you’re expecting a warm shower is the ultimate wake-up call, isn’t it? Looks like the old water heater’s decided to call it quits. We all know the drill and, fair dinkum, it’s a real pain.
But fear not! If you’ve got a bit of DIY spirit and want to get your hands dirty, this might just be your next weekend project. Popular Mechanics magazine reckons with some clear instructions, even an ambitious home handyman can swap out the dodgy old tank for a brand new one.
Our step-by-step guide is just what you need to navigate through this task so you can get back to those gloriously hot showers. You’ll feel like an absolute legend once it’s done!
Key Takeaways
- Ensure to gather all necessary tools and materials, including pliers, wrenches, Teflon tape, a soldering kit, and a torch kit for gas water heaters before starting the installation.
- Turn off the gas and water supply to the old water heater and drain it completely before beginning the installation process.
- Consider factors such as household size, hot water demand, energy efficiency, fuel source availability, space constraints, longevity of models, and installation costs while choosing the right size and type of water heater.
- Position and connect the new water heater in a well-ventilated area with proper fittings using adjustable wrenches. Test all valves for functionality after completion.
Preparation for Installation
Before starting the installation, make sure to gather all the necessary tools and materials including pliers, wrenches, pipe cutters, a soldering kit, Teflon tape, and a torch kit for gas water heaters.
Then turn off the gas and water supply to the old water heater before draining it completely.
Tools and materials required
We need to make sure we have all the tools and materials on hand before we start the installation of a new hot water heater. It’s essential to gather these items to ensure a smooth and efficient process.
- Adjustable wrenches: To tighten or loosen fittings and connections during the installation.
- Pipe wrenches: Essential for gripping and turning pipes, particularly when working with gas lines.
- Screwdrivers: A variety of sizes are needed for securing electrical components and covers.
- Teflon tape: This helps create water-tight seals on threaded pipe joints.
- Soldering torch kit: Necessary for securely joining copper piping if your setup requires it.
- Copper fittings: If your installation includes copper pipes, these are crucial for making proper connections.
- Pipe cutter: This provides a clean cut on pipes, ensuring they fit together well.
- Hacksaw: For cutting through any non-pipe materials that may be in the way or need adjusting.
- Tube bending spring or tool: It helps in shaping copper tubing without kinking it if bends are required for the installation.
- Voltage tester: Safety first – use this to check that all power is off before starting work with electric heaters.
- Garden hose: You will use this for draining the old water heater prior to removing it.
- Plumber’s putty or sealing compound: To seal around fittings and prevent leaks at connection points.
- Pressure relief valve: A critical safety component is required for every new hot water heater setup.
- Electrical wire and connectors (for electric heaters): These are used when connecting your electric water heater to the power supply.
- Gas supply line (for gas heaters): Make sure you have an adequate gas line if installing a gas water heater.
- Venting materials (for gas heaters): Proper venting is a must when setting up a new gas hot water system.
Turning off the gas and water supply
Before starting the installation process, it’s important to turn off the gas and water supply to the old water heater. This will ensure a safe and smooth removal of the old unit and make way for the installation of the new one. Here’s how to do it:
- Locate the gas shut-off valve near the old water heater and turn it clockwise to shut off the gas supply.
- Next, find the main water shut-off valve for your home and turn it clockwise to stop the flow of water to the water heater.
- Once both valves are closed, open a hot water tap in your house to relieve any pressure in the lines.
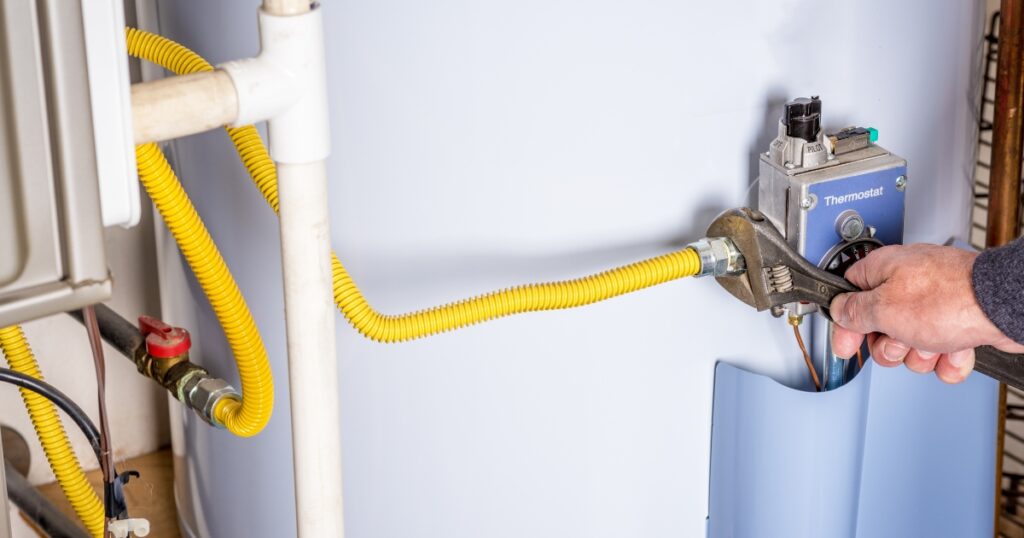
- Use a wrench to disconnect the gas line from the old water heater, ensuring that there are no gas leaks.
- Similarly, use a pipe wrench or adjustable pliers to disconnect the cold and hot water supply lines from the old water heater.
Draining the old water heater
After turning off the gas and water supply, draining the old water heater is the next step in the process. Here’s what you need to do:
- Connect a garden hose to the drain valve at the bottom of the water heater.
- Place the other end of the hose in a nearby floor drain or outside where it can safely discharge hot water.
- Open a hot water tap in your home to allow air into the system as it drains.
- Turn on the heater’s relief valve to speed up draining and prevent vacuum lock.
- Once all the water has drained, close both valves and disconnect the hose.

Choosing the Right Water Heater
When choosing the right water heater, consider factors such as the size and type that suit your home’s hot water usage. Take into account the number of people in your household and any future expansions to ensure adequate supply. Additionally, consult a professional if you are unsure about which water heater will best fit your needs.
Determining the correct size and type
When determining the correct size and type of water heater, consider factors such as the number of occupants in your home and your hot water usage patterns. It’s important to calculate the peak hour demand for hot water to ensure that the new water heater can meet your household’s needs.
Additionally, take into account whether you need an electric or gas water heater based on your home’s existing infrastructure and energy source availability.
Choosing a tankless hot water system provides benefits such as unlimited hot water supply, energy efficiency, and space-saving design. On the other hand, traditional tank-style heaters may be suitable for larger households with higher demand for hot water.
Factors to consider
When determining the correct size and type of water heater, consider the following factors:
- Household Size: The number of people in your household will influence the size of the water heater you need. Larger households require a higher capacity to provide sufficient hot water for everyone.
- Hot Water Demand: Consider the peak times when hot water is needed in your home, such as mornings or evenings. This will help determine the appropriate capacity to meet your household’s demand.
- Energy Efficiency: Look for energy-efficient models that can help reduce energy costs over time while still providing reliable hot water.
- Fuel Source: Depending on availability and preference, choose between electric, gas, or solar-powered water heaters to suit your needs and budget.
- Space Constraints: Evaluate the available space for installation and select a water heater that fits comfortably within the designated area.
- Longevity: Consider the lifespan of different water heater models and factor in maintenance requirements before making a purchase decision.
- Installation Costs: Assess the initial cost of purchasing and installing a new water heater, including any additional plumbing or electrical work required for installation.
- Warranty Coverage: Check for comprehensive warranty coverage that includes both parts and labour to protect your investment in case of any issues with the unit.
Installing the New Water Heater
Position the new water heater in a suitable location and connect it to the plumbing system using the appropriate fittings and valves. Make sure to follow the manufacturer’s instructions for electrical or gas connection, ensuring everything is securely in place before testing for any leaks.
Positioning and connecting to plumbing
To position and connect the new hot water heater to the plumbing, follow these steps:
- Ensure the new water heater is placed in a well-ventilated area with sufficient space around it for maintenance and future repair work.
- Use appropriate fittings to connect the cold water inlet and hot water outlet pipes to the corresponding connections on the new water heater.
- Securely tighten the fittings using adjustable wrenches to prevent any leaks.
- If installing a tankless system, connect it directly to the existing plumbing lines and ensure proper sealing at all connection points.
- Check for any signs of leaks or drips after turning on the water supply before proceeding further.
- Test all valves, connections, and faucets for proper functionality before considering the installation complete.
Options for electrical or gas connection
After positioning and connecting the new water heater to the plumbing, the next step is to consider the options for an electrical or gas connection. Here are the key points to keep in mind:
- Determine if your home has access to a gas line or if it’s equipped with an electric water heater. Consider factors such as existing hookups and local building codes.
- If opting for a gas water heater, ensure that you have a dedicated gas line with proper venting and space requirements for installation.
- When choosing an electric water heater, factor in the availability of an appropriate electrical outlet and ensure that the unit matches your voltage requirements.
- Ensure that all connections are made securely and comply with safety regulations and manufacturer instructions.
- It’s advisable to consult with a professional if you’re uncertain about handling complex electrical or gas connections.
Installing fittings and valves
To install fittings and valves for your new hot water heater, follow these steps:
- Connect the water pipes to the water heater using appropriate fittings, ensuring a secure and leak-free connection.
- Install a temperature and pressure relief valve on the side of the water heater, allowing any excess pressure or temperature to be released safely.
- Position a shut-off valve on both the hot and cold water lines leading to the water heater, enabling easy isolation of the unit when necessary.
- Test each fitting and valve for leaks by turning on the water supply and carefully inspecting for any signs of dripping or moisture.
- Confirm that all fittings are securely fastened and valves are functioning properly before proceeding with connecting the power or gas supply to your new hot water heater.
Tips for Smooth Installation
Use a soldering and torch kit for secure connections. Properly use pliers to tighten fittings and valves. Inspect the water heater for leaks before completion. For more expert tips on installing your new hot water heater, read on!

Soldering and using a torch kit
We will need to use a torch kit with soldering supplies to properly connect the pipes. Here are the steps:
- Prepare the surface by cleaning it with an emery cloth.
- Apply flux to both the pipe and fitting.
- Heat the joint evenly using the torch until it’s hot enough for the solder to melt on contact.
- Feed the solder into the joint, ensuring it flows all around for a secure connection.
- Wipe off any excess solder and let it cool before testing for leaks.
Proper use of pliers
After successfully soldering and using a torch kit, the next step is to use pliers carefully during the installation process. Here are some tips for the proper use of pliers:
- Use needle-nose pliers to grip and hold small objects in tight spaces without hurting your hand.
- Ensure that the handles are not greasy or oily to maintain a secure grip.
- Wear safety goggles while using pliers to protect your eyes from any debris or small particles.
- Always use the right size of pliers for the job to ensure a firm grip and prevent slipping.
- Keep the cutting edges of diagonal pliers sharp and free from damage to ensure clean cuts on wires or metal components.
- Avoid using pliers as a wrench because they are not designed for high-torque applications.
Inspecting for leaks
Inspecting for leaks is crucial to ensure the successful installation of your new hot water heater. Here’s a step-by-step guide to follow:
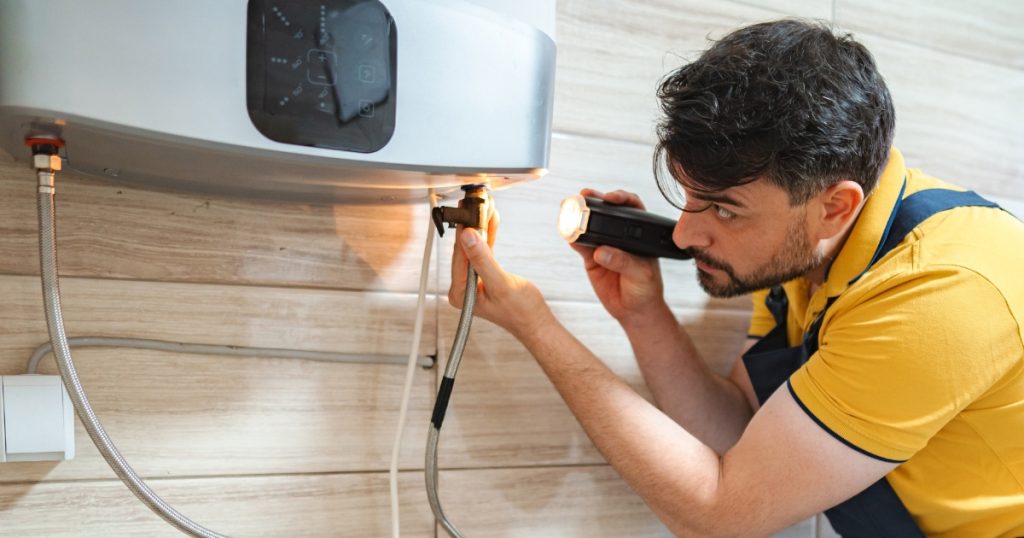
- Carefully check all the connections, fittings, and valves for any signs of water leakage.
- Use a flashlight to inspect around the base of the water heater for any puddles or wet spots.
- Look for any dripping or moisture around pipes, joints, and the pressure relief valve.
- Test all connections by gently wiping a tissue or paper towel along each joint to check for moisture.
- Monitor the area around the T&P (temperature and pressure) relief valve for any signs of leakage.
- Check for leaks in both the hot and cold water supply lines connected to the new water heater.
Completion and Final Checks
We’ll connect the power and water supply, reconnect the vent for gas heaters, and test the hot water supply to ensure everything is working properly.
Connecting power and water supply
To connect the power and water supply to your new hot water heater, follow these steps:
- Turn off the circuit breaker or gas valve for safety.
- Connect the electrical wires according to the manufacturer’s instructions for electric heaters or reconnect the gas line for gas heaters.
- Open the water supply valve to allow water into the tank.
- Check for leaks around all connections and fixtures.
- Once everything is securely connected, turn on the power or gas supply to activate the heater.
- Test the hot water supply at a faucet to ensure it’s functioning properly.
Reconnecting vent (for gas heaters)
After connecting the power and water supply, it’s important to reconnect the vent for gas heaters. Here’s how to do it:
- Check the vent pipe and ensure it is clean and free from any obstruction or damage.
- Align the vent pipe with the collar on top of the water heater and secure it in place with screws or clamps.
- Use a level to ensure that the vent pipe is straight and properly aligned with the collar.
- Apply heat-resistant sealant around the connection between the vent pipe and collar to prevent any leaks.
- Double-check the connection to ensure it is secure and airtight before turning on the gas supply.
- Test the gas water heater to ensure that it is functioning properly and safely after reconnecting the vent.
- Refer to the manufacturer’s instructions for specific guidelines on reconnecting the vent for your particular model of gas water heater.
Testing hot water supply
After reconnecting the vent for gas heaters, it’s important to test the hot water supply. Here are the steps to ensure everything is working as it should:
- Turn on the water heater and let it reach operating temperature.
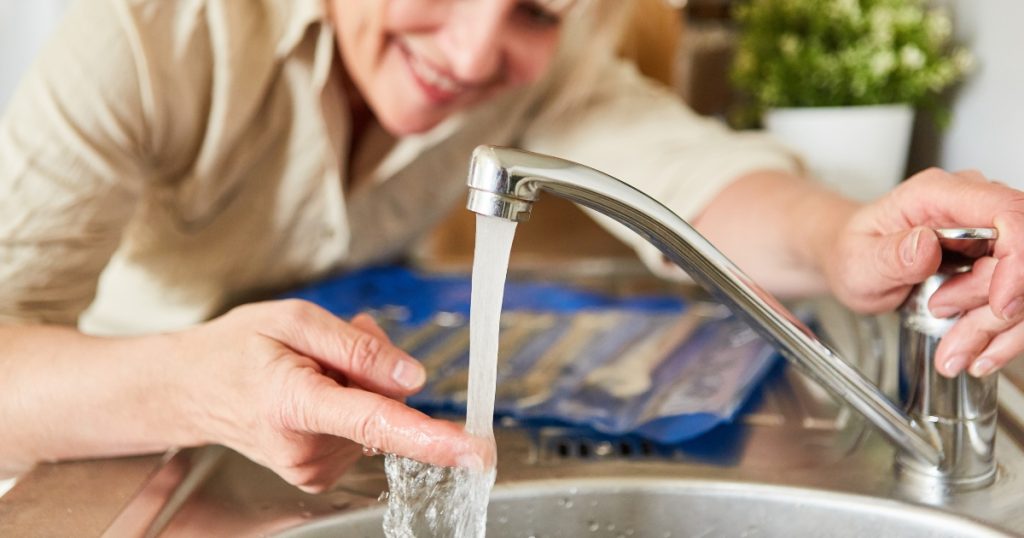
- Open hot water taps in different areas of your home to check for consistent hot water flow.
- Verify that the water reaches the desired temperature by using a thermometer at each tap.
- Listen for any unusual sounds or sputtering that may indicate issues with the heater or plumbing.
Learn How to Install a Hot Water Heater
Completing a new hot water heater installation requires attention to detail and careful consideration of safety. After connecting the power and water supply, testing the hot water system is essential for ensuring proper functionality.
Inspecting for leaks and making final adjustments will ensure a successful DIY installation.