Know the shivers of ducking under a spray that’s more Arctic than inviting? You’re not alone. In Oz, we chew through nearly a fifth of our home energy just keeping water toasty, so when the system throws a wobbly, it hits us in both comfort and coin.
Our yarn today is chockers with savvy tips to get your hot water humming again without needing to call in the big guns. So grab a cuppa and settle in – we’re about to make sense of those head-scratching fixes and turn them into something you can knock over before Monday rolls around.
Trust us, it’ll be worth your while!
Key Takeaways
- Checking thermostat settings and testing heating elements with a multimeter are essential steps in troubleshooting hot water heater issues.
- Regularly inspecting the unit for leaks and promptly addressing any found can prevent costly repairs and maintain the safety of your home.
- Utilising proper tools, such as a multimeter, adjustable wrench, and screwdriver set, is crucial to accurately diagnose issues and safely replace components in a hot water heater.
Common Problems with Hot Water Heaters
- No hot water: This can be caused by a faulty heating element, thermostat issues, or a power supply problem.
- Low water pressure: Sediment buildup in the tank or pipes can cause reduced water pressure.
- Leaks: Cracks or corrosion in the tank can result in leaks.
- Discoloured or contaminated water: Rust and sediment accumulation in the tank can lead to discoloured or dirty water.
- Failure to heat properly: A malfunctioning thermostat or heating element can cause the water heater to not heat up as expected.
No hot water
If you’ve turned on the tap expecting a warm shower only to be greeted by chilly water, your hot water heater might need some attention. We can start by checking the thermostat settings; they could be set too low or not functioning properly.
It’s also possible that the heating element has failed and needs replacement.
We’ll shut off the power supply to our electric hot water system before beginning any work, as safety comes first. After doing so, we can test the heating elements using a multimeter and check for continuity – if there isn’t any, this is likely where our problem lies.
Replacing faulty components like these is part of regular maintenance that keeps our showers comfortably warm.
Low water pressure
If you’ve been experiencing low water pressure in your hot water system, it can be a frustrating issue to deal with. Low water pressure could indicate a problem with the pressure regulator, sediment buildup in the pipes, or a faulty heating element.
It’s essential to troubleshoot and identify the root cause of the low water pressure before attempting any repair work. Checking for blockages or sediment buildup in the pipes and ensuring that the pressure regulator is functioning properly are simple initial steps that may resolve this common problem.
When addressing low water pressure, homeowners should consider testing and potentially replacing the pressure valve if necessary. If these troubleshooting steps do not resolve the issue, seeking professional help may be necessary to accurately diagnose and rectify any underlying problems causing low water pressure in your hot water system.
Leaks
When checking for leaks in your hot water heater, it’s important to inspect all visible pipes and fittings for any signs of moisture or corrosion. Water stains and puddles near the base of the tank could indicate a leaking internal component that needs replacement.
Ensure to examine the pressure relief valve and hot water outlet connection for any drips or pooling water. Promptly addressing these leaks is crucial to preventing further damage to your system and maintaining its efficiency.
Regularly monitoring your hot water heater for leaks can help you identify potential issues early on, allowing you to take necessary precautions before they develop into larger problems.
Discoloured or contaminated water
If you notice discoloured or contaminated water coming from your hot water tap, it may indicate sediment buildup in the tank or corroded pipes. This issue can affect the quality of your water and potentially damage your plumbing system.
Flushing out the water heater and checking for rust in the tank or pipes is crucial to prevent further contamination.
Testing the thermostat settings and pressure valves will also help determine if there are underlying issues causing discolouration in your hot water supply. It’s important to address this problem promptly by following safety precautions and seeking professional guidance if needed, as contaminated water poses health risks and can lead to more significant problems with your hot water system over time.
Failure to heat properly
If you’ve ruled out discoloured or contaminated water as the issue, failure to heat properly may be the culprit. This can indicate a problem with your thermostat settings, damaged heating elements, or a malfunctioning pressure valve.
Understanding these potential problems and knowing how to test and replace these components is essential for maintaining your hot water system.
We’ll guide you through troubleshooting your thermostat settings, testing and replacing heating elements, and checking pressure valves. Follow safety precautions before beginning any repair work – understanding these basics will help in keeping your hot water system running smoothly.
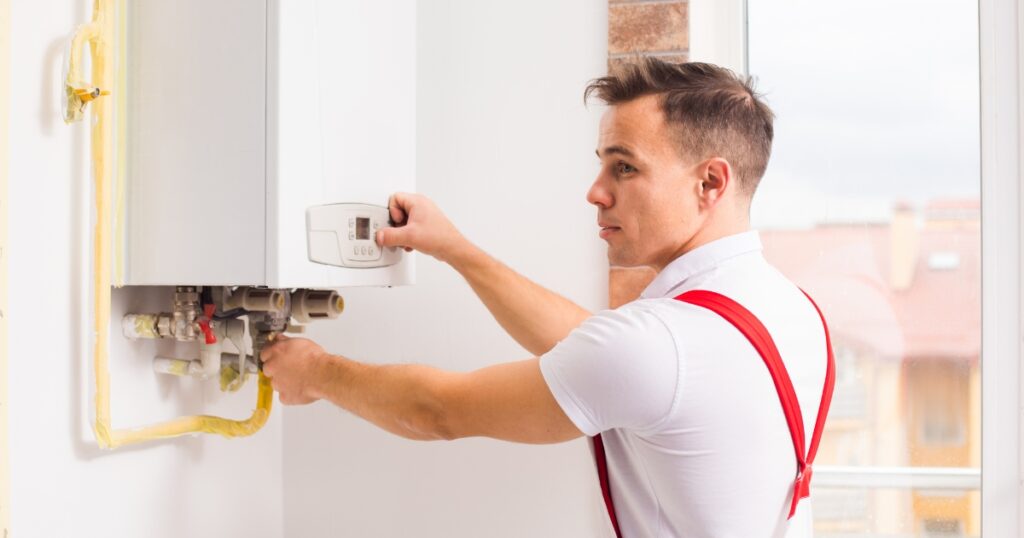
DIY Hot Water Heater Testing and Repair
To test and repair your hot water heater, you will need a few tools such as a multimeter, screwdriver, and adjustable wrench. First, turn off the power to the water heater and drain some of the hot water from a tap to relieve pressure. Then, use the multimeter to test the heating elements for continuity.

If they are faulty, replace them with new ones following the manufacturer’s instructions. Finally, check the thermostat and pressure relief valve to ensure they are functioning properly. Remember to take all necessary safety precautions when working on your water heater.
Tools and materials needed
To replace common components in a hot water heater, we will need the following tools and materials:
- Adjustable wrench – for loosening and tightening connections
- Screwdriver set – for removing panels and accessing internal components
- Voltage tester – to ensure there is no electrical current before starting work
- Pipe wrench – for disconnecting and reconnecting plumbing connections
- Replacement parts – including heating elements, thermostats, pressure relief valves, and other components as needed
- Teflon tape – for resealing threaded connections to prevent leaks
- Pipe cutter or hacksaw – for cutting pipes if necessary during repairs or replacements
Steps for testing and repairing elements
After gathering the necessary tools and materials, it’s important to understand the steps for testing and repairing elements in your hot water heater. Here’s a detailed guide to help you through this process:
- Inspect the thermostat settings to ensure they are correctly adjusted according to your hot water needs.
- Test the pressure relief valve by lifting and releasing its lever for a few seconds, allowing small amounts of water to be released to check if it operates properly.
- Check for leaks around the heater as well as in the pipes connected to it.
- Use a multimeter to test heating elements, ensuring they are functioning at their designated capacity.
- If you notice any discoloured or contaminated water, consider draining and flushing out the tank to remove any built-up sediment.
- Inspect the wiring connections on your electric water heater, looking for signs of corrosion or wear that may need repair or replacement.
- After completing these steps, turn on your hot water system and monitor its performance to ensure that all repairs are successful.
Precautions to take
- Before beginning any DIY water heater repair, ensure to turn off the power and water supply to the unit.
- Wear protective gear, such as gloves and safety goggles, to prevent burns from hot water or steam and to protect your eyes from potential debris.
- Use a voltage tester to make sure the power is off before touching any electrical components of the water heater.
- Allow the water in the tank to cool down before attempting to work on it, as hot water can cause serious burns.
- Always follow the manufacturer’s instructions and recommended safety procedures when working on your hot water heater.
- Double-check that all connections are secure and properly tightened before turning the power back on after completing repairs or maintenance.
- If you are unsure about any aspect of the repair process, do not hesitate to seek professional help to avoid potential accidents or damage to your hot water system.
Common Mistakes to Avoid
Leaving the tank open can lead to a range of issues, from water leaks to electrical hazards, so always make sure to securely close it after any repairs or maintenance.
Leaving the tank open
When the tank is left open during hot water heater repair, it can lead to potential hazards such as scalding from hot water or exposure to electrical components. Failing to securely close the tank may also allow contaminants and debris to enter, causing damage to internal components.
It’s crucial to always double-check that the tank is properly sealed before proceeding with any repairs or replacements.
Not securing the tank after completing maintenance work can result in leaks, leading to water damage and potentially costly repairs. Additionally, an open tank poses a safety risk if children or pets are present in the household.
Not checking for leaks
Before proceeding with any hot water heater repair or replacement, it is crucial to check for leaks in the system. Neglecting this step can lead to potential water damage and unsafe conditions within your home.
If overlooked, even small leaks can escalate into major issues over time, causing structural damage and mould growth. Regularly inspecting your hot water heater for leaks should be a priority as part of routine maintenance.
A thorough inspection will help identify any leaks early on, preventing costly repairs down the line and ensuring the safety of your home.
Checking for leaks in your hot water heater is a vital part of its maintenance routine that cannot be overlooked. Whether you have an electric, gas, or tankless water heater, staying vigilant about identifying and addressing any leakage promptly will safeguard your property from potential harm.
Using incorrect tools or methods
Using incorrect tools or methods can lead to costly mistakes and potential safety hazards when attempting hot water heater repair. Proper tools, such as a multimeter for testing electrical components and a pipe wrench for securing fittings, are essential for accurate diagnosis and safe replacement of parts.
Choosing the wrong tools can result in damage to the heater or personal injury, making it crucial to research and invest in the correct equipment before starting any repair work.
Following improper methods during DIY water heater maintenance or replacement can also lead to further damage. It’s important to carefully follow manufacturer instructions and seek guidance from reliable sources to prevent errors that could worsen existing problems.
Choosing the wrong heater or element
When attempting to replace a hot water heater component, it’s crucial to avoid choosing the wrong heater or element. This mistake can lead to inefficiency and potential damage to your system.
To ensure you select the right replacement part, take note of your current heater model and specifications before purchasing a new element. Additionally, thoroughly research and compare different options available in the market to find the most suitable one for your specific water heating system.
By doing so, you can effectively prevent any complications that may arise from using an incompatible or subpar replacement component.
Once you have chosen the correct heater or element for your water heating system, proceed with confidence as you prepare to execute the step-by-step replacement process outlined in our guide.

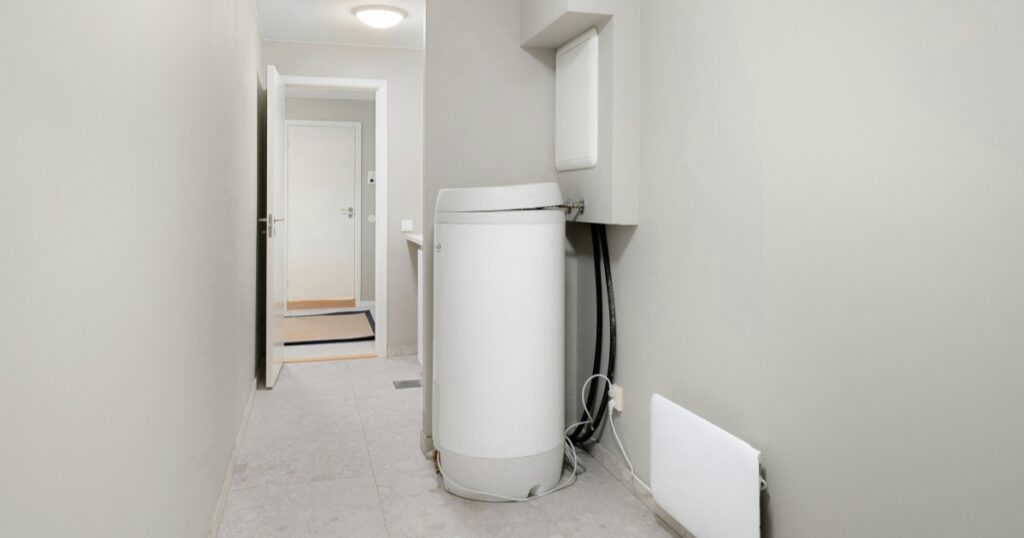
Replacing Hot Water Heater Components
After identifying the issue, we will guide you through choosing the right replacement parts and provide a step-by-step guide for replacing elements.
Identifying the issue
When identifying the issue with your hot water heater, it’s important to first diagnose the specific problem you are experiencing.
Common issues include no hot water, low water pressure, leaks, discoloured or contaminated water, and failure to heat properly.
Once you have pinpointed the issue, you can then move forward with determining which component of the hot water heater may need replacing. This could involve testing thermostat settings, checking for leaks in various parts of the system including pressure valves and inlet/outlet pipes as well as inspecting elements such as heaters and thermostats for signs of wear or damage.
By understanding these key steps in identifying common issues with a hot water system while keeping safety precautions in mind during inspection and replacement processes; homeowners can efficiently address their hot water needs without unnecessary delay or expenses caused by underlying problems within their home’s heating system.
Choosing the right replacement parts
When replacing components in your hot water heater, it’s crucial to choose the correct replacement parts. Matching the new part with the specific make and model of your water heater ensures compatibility, optimal performance, and safety.
Understanding the anatomy of your water heater and identifying the exact issue will guide you in selecting the appropriate replacement elements or thermostats. It’s important to refer to the manufacturer’s manual or seek professional advice if you are uncertain about which replacement part to use.
In addition, being aware of different types of water heaters – such as electric, gas, or tankless varieties – can help in choosing the right replacement parts for your specific system.
Ensuring that you have selected the correct parts is essential for successful DIY repair and maintenance of your hot water system.
Step-by-step guide for replacing elements
After choosing the right replacement parts, it’s important to follow a step-by-step guide for replacing elements in your hot water heater. Here is a detailed list of the essential steps:
- Turn off the power and water supply to the heater before beginning any work.
- Drain the tank to remove any remaining water before starting the element replacement process.
- Use the appropriate tools to disconnect and remove the old heating element from the water heater.
- Clean the area around the opening where the new element will be installed.
- Install and secure the new heating element into place using the correct tools and following manufacturer guidelines.
- Reconnect any wiring or attachment points carefully, ensuring everything is secured properly.
- Open the water supply and fill up the tank, checking for any leaks around the newly replaced element.
- Once everything is confirmed secure, turn on the power to your hot water heater and test its functionality thoroughly.
- Finally, monitor your hot water system for some time after replacing elements to ensure that everything is functioning correctly without any issues or leaks.
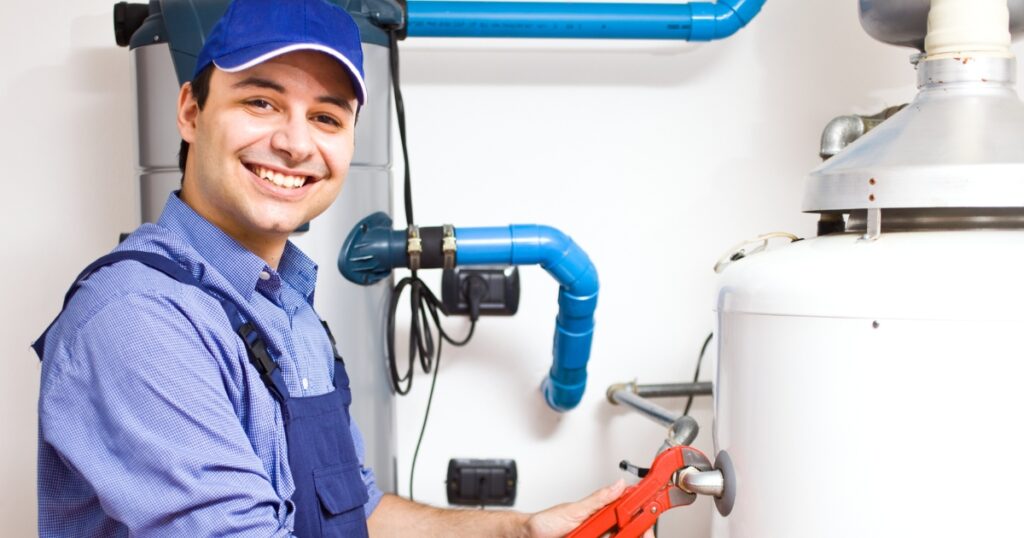
The Importance of Professional Hot Water Heater Repair
Professional hot water heater repair is essential for ensuring the safety and efficiency of your system. Hiring a professional can help identify and fix complex issues, ensure proper installation, and provide expert advice on maintenance.
Don’t overlook the benefits of professional assistance when it comes to maintaining your hot water heater.
Benefits of hiring a professional
Hiring a professional for hot water heater repair provides peace of mind and ensures the job is done safely. Professional plumbers have the necessary expertise and tools to diagnose issues accurately, leading to efficient repairs.
Additionally, they can offer maintenance tips that help prolong the lifespan of your hot water system.
Professionals are also knowledgeable about various types of water heaters, including electric, gas, and tankless varieties. Their experience enables them to identify common reasons for water heater replacement and provide guidance on choosing the right type for your home.
Steps for finding the right professional
After understanding the benefits of hiring a professional, it’s essential to consider the following steps for finding the right professional to repair or replace your hot water system:
- Research thoroughly to find reputable professionals in your area who specialise in hot water heater repair or replacement.
- Ask for recommendations from family, friends, or trusted neighbours who have recently had their hot water systems serviced.
- Check online reviews and ratings of local professionals to gauge customer satisfaction levels and reliability.
- Verify the credentials and experience of potential professionals by checking their licenses, certifications, and years of experience in the field.
- Request quotes from multiple professionals and compare their prices, services offered, and warranties provided for the work.
- Inquire about the timeline for completing the repair or replacement to ensure it aligns with your schedule and requirements.
- Communicate openly with potential professionals to discuss any concerns, ask questions about the process, and ensure they understand your specific hot water system needs.
- Consider scheduling a consultation with the chosen professional to further evaluate their expertise and professionalism before making a final decision.
- Finalise your choice based on a combination of factors such as reputation, qualifications, pricing, services offered, and overall rapport with the professional.
Common reasons for water heater replacement
Before replacing a water heater, it’s crucial to recognise the common reasons that lead to its replacement. Gradual wear and tear often cause a decline in efficiency, resulting in increased energy consumption and higher utility bills.
Corrosion inside the tank can also be a sign of aging, leading to leaks and potential water damage. Furthermore, if your water heater is constantly requiring repairs or if it’s more than 10-15 years old, it may be time to consider a replacement for improved performance and safety.
In addition, addressing changes in hot water quality such as discolouration or metallic taste indicates deterioration within the system, signalling the need for a new water heater installation.
Maintenance tips for prolonging water heater lifespan
- Regularly flush the tank to remove sediment buildup, which can affect the efficiency of the water heater and reduce its lifespan.
- Insulate your hot water pipes to prevent heat loss and reduce the workload on your water heater, ultimately extending its lifespan.
- Test the pressure relief valve annually to ensure it is functioning properly and releases excess pressure, preventing damage to the tank and prolonging the water heater’s lifespan.
- Set the thermostat temperature to a moderate level (120°F or 49°C) to reduce wear and tear on the heating elements, leading to a longer lifespan for your water heater.
- Check for leaks around your water heater regularly and repair them promptly to prevent corrosion or damage that could shorten its lifespan.
- Schedule regular maintenance with a professional plumber to inspect and service your water heater, which can help catch minor issues before they become major problems.
- Install a water softener if you have hard water in your area, as this can reduce mineral buildup in the tank and prolong the lifespan of your hot water system.
By following these maintenance tips, you can ensure that your water heater operates efficiently and has an extended lifespan, saving you money on repairs or replacement in the long run. Now let’s move on to discussing common mistakes to avoid when repairing a hot water heater.
Be Familiar with Hot Water Heater Component Replacement
In conclusion, DIY water heater repair can be manageable with the right tools and knowledge. Checking thermostat settings, and pressure valves, and replacing damaged parts are crucial steps in repairing a hot water system.
Understanding the basic steps of replacing a water heater is essential for both maintenance and installation of a new one. Safety precautions should always be followed to ensure successful repair and maintenance of common components in a hot water heater.