Just walked through the door, keen for a hot shower to wash the day away, and then.. nope. The pilot light’s gone out on your water heater. Bloody nuisance, right? No worries though, mate; it’s often just a dodgy thermocouple causing grief.
This yarn’s all about getting to the heart of that problem. So grab a cuppa, settle in, and let’s sort this out together – we’ll have that hot water running for you in no time!
Key Takeaways
- Inspect and clean your thermocouple regularly to prevent the pilot light on your gas water heater from going out.
- Check that the water heater has proper ventilation and air supply to maintain a steady pilot flame.
- Clear any blockages in flue venting to ensure efficient operation of the pilot light.
- Keep an eye on the gas supply and make sure it’s uninterrupted for consistent ignition of the pilot light.
- If DIY methods fail, don’t hesitate to call a professional technician for hot water heater repairs.

Understanding Pilot Light Problems
The pilot light is a small flame that ignites the gas burner in your hot water heater. It’s important to visually inspect the pilot light regularly to ensure it’s working properly.
If the pilot light won’t stay lit, there could be several possible causes and problems that need troubleshooting.
What is a pilot light and how does it work?
A pilot light is a small, constantly burning flame in our gas hot water heater. It’s crucial because it ignites the main burner when we need to heat water. So every time we turn on the tap for warm water, this little flame kicks things off by lighting the bigger flame that does all the work.
This tiny hero works hand in hand with a safety device called a thermocouple. Think of the thermocouple as a guardian angel for your hot water system; if the pilot light ever goes out accidentally, this part shuts off the gas supply to prevent any leakages or dangerous situations from arising.
That’s why if there are issues like ignition problems or it won’t stay lit, our first check should be whether this component is faulty or dirty.
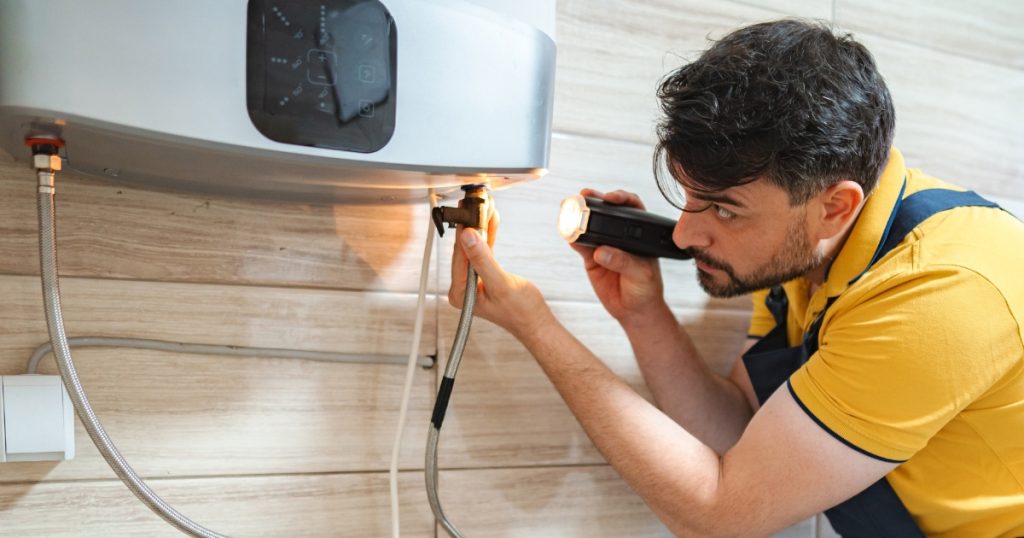
Visual inspection of the pilot light
When inspecting the pilot light, we must carefully look for any signs of malfunction or damage. Here’s what to check for during a visual inspection:
- Examine the pilot light flame – it should be blue with a small yellow tip and burn quietly without flickering.
- Check for soot or other debris around the pilot light area, as this could indicate a ventilation issue.
- Look for any visible damage or corrosion on the pilot light assembly and nearby components.
- Ensure that the flame is directly touching the thermocouple probe, as this is crucial for proper functioning.
- Inspect the surrounding area for any gas odours, which could signal a gas supply problem.
Troubleshooting Pilot Light Issues
When the pilot light on your hot water heater won’t stay lit, it can be frustrating and inconvenient. There are several possible causes for this issue, and in this section, we will discuss some tips for troubleshooting and addressing these problems to get your hot water flowing again.
Possible causes and problems
When the pilot light won’t stay lit on your gas water heater, several issues may be at play. Here are the potential causes and problems to consider:
- A faulty or dirty thermocouple can cause the pilot light to go out frequently.
- Misaligned or damaged thermocouples may fail to detect the pilot flame, leading to shutdown for safety reasons.
- Issues with the spark ignitor, such as dirt or misalignment, can prevent proper ignition of the pilot light.
- Low gas pressure or a bent pilot tube termination can disrupt the flow of gas needed to keep the pilot light lit.
- If the probe of the thermocouple is not in contact with the pilot flame, it may not generate enough voltage to keep the gas valve open.
- Drift, sediment, rust, or a malfunctioning thermocouple could be preventing hot water even if the pilot light remains lit.
- Inadequate combustion air supply due to blockages or obstructions can lead to poor performance of the pilot light.
Tips for troubleshooting
After identifying the possible causes and problems, here are some tips for troubleshooting pilot light issues for your gas water heater:
- Check the thermocouple: Ensure the thermocouple is clean, properly aligned, and in good condition. A dirty or faulty thermocouple can cause the pilot light to go out.
- Inspect the gas supply: Verify that there are no obstructions in the gas line and that the gas pressure is adequate. Low gas pressure can lead to an unstable or extinguished pilot light.
- Examine the pilot tube termination: Make sure that the pilot tube termination is not bent or obstructed, as this can affect the stability of the pilot flame.
- Test the spark ignitor: Confirm that the spark ignitor is functioning correctly by checking for sparks when relighting the pilot light.
- Look for air supply issues: Ensure that there are no obstructions affecting the combustion air supply to the water heater, as this can impact the performance of the pilot light.
- Monitor probe contact: Check that the thermocouple probe is in continuous contact with the pilot flame, as poor contact can lead to intermittent operation of the pilot light.
- Address flue venting: Inspect for any blockages or restrictions in the flue venting system, which could cause improper venting and affect pilot light performance.
- Seek professional assistance if needed: If troubleshooting does not resolve the issue or if you are unsure about any aspect of your water heater’s operation, it’s best to consult a qualified technician experienced in gas appliance repair.
Common Issues with Pilot Lights on Gas Water Heaters
Improper venting or air supply can lead to pilot light issues. Ignition problems, such as the pilot light not staying lit or having flame issues, can also occur.
Improper venting or air supply
If the pilot light on your gas water heater won’t stay lit, improper venting or air supply might be to blame. This can lead to insufficient oxygen reaching the pilot light, causing it to extinguish.

To address this issue, check for obstructions or blockages in the flue venting and ensure that there is proper airflow around the water heater. Regular maintenance, such as cleaning out any debris or dust from the surrounding area, will help maintain a clear passage for combustion air.
To prevent future problems with improper venting or air supply affecting your pilot light, it’s essential to inspect and maintain proper ventilation systems regularly. Checking for leaky vents and addressing any issues with ductwork will help ensure that your gas water heater operates efficiently and safely.
The pilot light won’t ignite
To troubleshoot the issue of a pilot light that won’t ignite, start by inspecting the gas supply to ensure it is on and functioning. Check for any obstructions or blockages in the gas line, and confirm that there are no leaks present.
If everything appears to be in order with the gas supply, examine the condition of the spark ignitor to see if it needs cleaning or replacement. Additionally, consider checking for low gas pressure as it may prevent successful ignition.
If troubleshooting these areas doesn’t resolve the problem, you might need to inspect the pilot tube termination for any signs of damage or bending that could hinder proper ignition.
It’s also worth noting that a faulty thermocouple can sometimes cause issues with igniting the pilot light. Therefore, considering replacing a malfunctioning thermocouple could potentially resolve this problem.
The pilot light won’t stay lit
If the pilot light won’t stay lit, it could be due to a faulty or misaligned thermocouple. A dirty or damaged thermocouple can also cause this issue. It’s crucial to ensure that the probe is in contact with the pilot flame to prevent frequent outages.
Additionally, if you have already replaced the thermocouple and the pilot light still won’t stay lit, there may be other underlying issues that need to be addressed. Regular maintenance and cleaning can help prevent these problems, ensuring your hot water heater runs smoothly.
Checking for proper ventilation and air supply is essential as well. Addressing potential issues with flue venting or gas regulators can contribute significantly to resolving this problem.
Pilot flame issues (too large or too small)
If the pilot flame on your gas water heater appears unusually large or small, it could indicate a problem with the burner assembly. A too-large or yellowish flame may signal incomplete combustion due to a clogged or dirty burner orifice, leading to increased carbon monoxide production and potential safety hazards.
Conversely, a too-small blue flame might be caused by an obstructed air intake, disrupting the proper fuel-to-air ratio. To address these issues, ensure thorough cleaning of the burner assembly and inspect for any blockages in the air intake.
Regular maintenance and periodic checks can help prevent these pilot flame irregularities and maintain the efficient operation of your gas water heater.
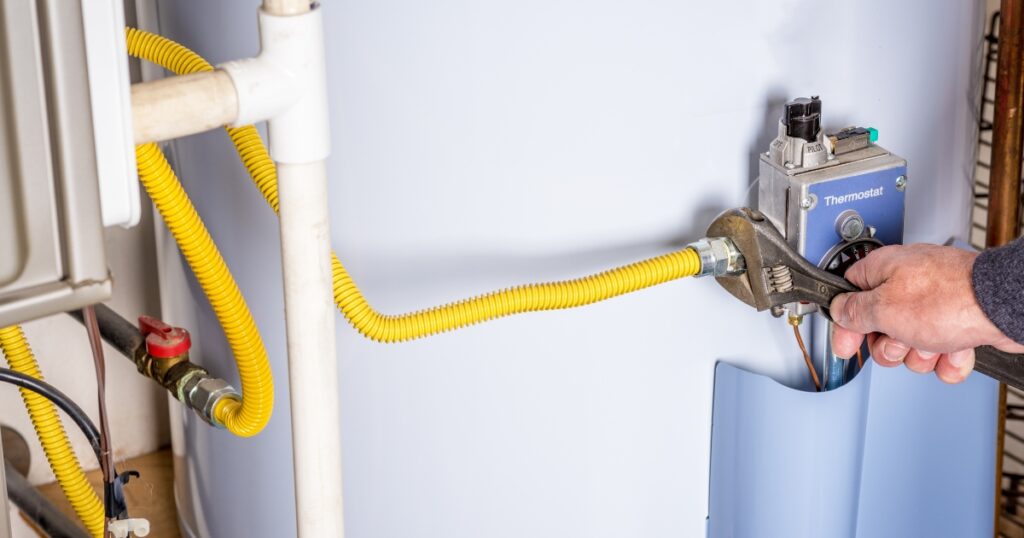
How to Relight a Pilot Light on a Gas Water Heater
To relight a pilot light on a gas water heater, first, locate the control knob and turn it to the “pilot” setting. Then, press down on the control knob while lighting the pilot with a long match or lighter.
Once lit, hold down the control knob for about 30 seconds to allow the thermocouple to heat up before releasing it. For more detailed instructions and tips on maintaining your water heater, continue reading our blog!
Step-by-step instructions with pictures
To relight the pilot light on your gas water heater, follow these steps:
- Turn the gas control knob to “off” and wait at least 5 minutes for any residual gas to dissipate.
- Locate the pilot light assembly and the gas control knob. The pilot light assembly is typically located behind a removable metal plate near the bottom of the water heater.
- Set the gas control knob to “pilot” and press down on it. While pressing down, use a long lighter or a gas-igniting button to ignite the pilot light.
- Keep pressing down on the control knob for 30 seconds after lighting the pilot light.
- Release the control knob and ensure that the pilot light stays lit. If not, repeat steps 1 – 4.
How to determine if a thermocouple needs to be replaced
To determine if a thermocouple needs to be replaced, follow these steps:
- Check for a weak pilot flame. If the pilot flame appears weak or keeps going out, it could indicate an issue with the thermocouple.
- Look for signs of corrosion or damage on the thermocouple. Any visible damage or corrosion may require replacement.
- Measure the voltage output using a multimeter. A low or fluctuating voltage output from the thermocouple can signal a malfunction requiring replacement.
- Test the resistance of the thermocouple using a multimeter. Unusual resistance readings can indicate a faulty thermocouple that needs replacing.
- Observe the behaviour of the pilot light when attempting to relight it. If the pilot light won’t stay lit after multiple attempts, it may be time to replace the thermocouple.
- Consult with a professional technician for further assessment if unsure about whether the thermocouple requires replacement.

Preventative Measures to Keep Your Pilot Light from Going Out
Regular maintenance and cleaning can help prevent pilot light issues. Ensuring proper ventilation, checking for air supply, and addressing potential thermocouples, flue venting, or gas regulator issues are also essential preventative measures.
To learn more about how to keep your pilot light from going out, read the full blog post on hot water heater repair.
Regular maintenance and cleaning
Regular maintenance and cleaning are essential for ensuring the proper functioning of your hot water heater. By following these simple steps, you can keep your pilot light from going out and maintain a steady supply of hot water:
- Inspect the pilot light regularly to ensure it is burning steadily and does not appear yellow or flickering.
- Clean the area around the pilot light using a soft brush or cloth to remove any dust, dirt, or debris that may be obstructing the flame.
- Check for any signs of rust or corrosion on the thermocouple and clean it with fine-grade sandpaper if necessary.
- Test the functionality of the thermocouple by gently bending it back into position if it appears misaligned.
- Remove any buildup of sediment or mineral deposits from the water heater tank to prevent interference with the pilot light’s operation.
- Verify that there is adequate ventilation around the water heater to ensure proper combustion air supply.
Checking for proper ventilation and air supply
Ensure the water heater’s ventilation system is unobstructed to prevent pilot light issues. Keep the area around the water heater clear of clutter and debris, allowing for proper airflow.
Regularly inspect vents and flue openings to ensure they are free from blockages that may impede air supply.
Check for any damage or deterioration in the venting system, as this could impact the combustion process. Address any cracks, leaks, or obstructions promptly to maintain an adequate air supply for the pilot light’s performance.
Addressing potential issues with the thermocouple, flue venting, or gas regulator
If you are experiencing issues with your pilot light going out, there may be underlying problems with the thermocouple, flue venting, or gas regulator. Here is what you can do to address these potential issues:
- Clean the thermocouple: Over time, soot and dirt can accumulate on the thermocouple, affecting its performance. Use a soft brush to gently clean the thermocouple to ensure it functions properly.
- Inspect the flue venting: Check for any obstructions or damage in the flue venting that could be affecting the air supply to the pilot light. Clear any blockages and ensure that the venting is securely connected.
- Test the gas regulator: If you suspect issues with the gas pressure, contact a professional to test and adjust the gas regulator as needed to ensure proper fuel flow to the pilot light.
- Replace a faulty thermocouple: If cleaning doesn’t resolve the issue, consider replacing a faulty thermocouple with a new one that meets the manufacturer’s specifications for your water heater model.
- Check for proper ventilation: Ensure that your hot water heater has sufficient combustion air supply for optimal performance and safety. Inadequate ventilation can lead to pilot light problems.
Same-Day Hot Water Solutions Tailored to Your Space!
To sum up, troubleshooting and relighting a pilot light on a gas water heater can often be done with DIY fixes. Regular maintenance and addressing potential issues with the thermocouple, flue venting, or gas regulator can prevent the pilot light from going out frequently.
A thorough visual inspection of the pilot light and an understanding of common issues will help in identifying and resolving problems promptly. Taking proactive measures to ensure proper ventilation and air supply is key to preventing future pilot light issues.
Keep safety in mind when working with gas appliances and always refer to professional service if needed.
Struggling with a pilot light that won’t stay lit on your hot water heater? Don’t let chilly showers ruin your day. Trust Hot Water Repairs Today to diagnose and fix the issue promptly. Our experienced technicians specialize in hot water heater repairs, including troubleshooting pilot light problems. Don’t wait until your water goes cold again. Contact us today, and let’s restore the warmth to your home.