We’ve all had that moment, haven’t we? You hop in for a shower expecting a comforting cascade of hot water, but instead, you’re met with a chilly surprise. It’s the last thing you need first thing in the morning, or after coming home from a long day at work.
More often than not, it’s that pesky pilot light on your hot water heater playing up again.
In Australia, where we’re no strangers to having our weather extremes, reliable hot water is pretty much non-negotiable. After all, around one-quarter of our home electricity bill comes from heating up our water – so when things go cold, it’s not just uncomfortable; it can hit us in the hip pocket too.
But don’t stress – with a few handy tips up your sleeve, you’ll be back to those cosy showers in no time. We’ll guide you through some easy troubleshooting and fixes for those niggling pilot light problems.
So grab your tools and let’s bring back the heat!
Key Takeaways
- Regularly maintain and clean the thermocouple to prevent pilot light issues in hot water heaters and furnaces.
- Ensure proper ventilation around the water heater to safeguard against strong breezes blowing out the pilot light.
- Check for leaks regularly, visually inspecting all connections and fittings for any signs of moisture or corrosion to ensure safe and efficient operation.
- When relighting a furnace pilot light, always turn off the furnace and gas for safety.
What is a thermocouple?
A thermocouple is a safety device in your hot water system that senses whether the pilot light is lit. It’s made up of two different metals joined at one end, creating an electric current when heated by the flame. This tiny electric signal keeps the gas valve open, allowing fuel to flow and keeping your water heater operating smoothly.

If this sensor stops working, it can’t detect the flame, causing the gas supply to shut off as a precaution. This means no more heat for your showers until you fix or replace it! Let’s dig into why these vital components might fail and how we can troubleshoot them together.
Reasons why pilot lights go out
A worn-out thermocouple can cause the pilot light to go out, leading to a lack of ignition in the water heater.
Worn out thermocouple
A worn-out thermocouple is a common reason for pilot light issues in water heaters and furnaces. Over time, the constant exposure to heat causes the thermocouple to deteriorate, leading to unreliable performance.
When this happens, it’s essential to replace the old thermocouple with a new one. This process involves turning off the shutoff valve, disconnecting the old thermocouple, and carefully installing the replacement. Testing for leaks after installation is crucial to ensure safe operation.
Strong breeze
A strong breeze blowing near the water heater can extinguish the pilot light. To prevent this, consider installing a wind guard around your water heater to shield it from gusts of wind.
Additionally, check for any cracks or gaps in the area surrounding your water heater that might be allowing drafts to blow out the flame.
Now let’s delve into another common issue with pilot lights – a kink in the flex tube and how to address it effectively.
Kink in the flex tube
If a strong breeze isn’t the culprit behind your pilot light troubles, it’s time to inspect the flex tube. Sometimes, a kink in the flex tube can disrupt the flow of gas to the pilot light, causing it to go out.
This issue can often be resolved by carefully straightening out any bends or kinks in the flex tube. Regularly checking for and addressing this problem can help maintain consistent operation and ensure that your hot water heater continues to function effectively.
It’s important for homeowners to regularly assess their appliances for potential issues such as kinks in the flex tube, as doing so will help prevent unexpected disruptions in operation and extend the lifespan of their equipment.
Filthy pilot light opening
A dirty pilot light opening can cause the flame to burn inconsistently or even go out. Dust, dirt, and debris can hinder the proper flow of gas and air, impacting the pilot light’s ability to stay lit.
Regularly cleaning the pilot light opening with a soft-bristled brush or compressed air will help ensure that it remains free from any blockages.
To prevent this issue, schedule routine maintenance checks for your water heater or furnace including cleaning the pilot light area. Keeping this crucial component clear of grime and build-up will contribute to more reliable operation and extend the lifespan of your appliance.
How to re-light a hot water heater pilot light
First, turn off the shutoff valve to ensure safety. Then, unscrew and replace the worn-out thermocouple with a new one. Finally, test for leaks to make sure everything is working properly before relighting the pilot light.
Turn off shutoff valve
To turn off the shutoff valve, locate the pipe leading into your water heater and find the nearby valve. Rotate the handle clockwise until it stops to shut off the gas supply. Use caution and turn off all gas-powered appliances if you smell gas or suspect a leak before seeking professional assistance.
After turning off the shutoff valve, wait a few minutes for any remaining gas to dissipate before attempting any repairs or relighting your pilot light. Always prioritise safety when dealing with gas connections and consult a professional if unsure about how to proceed.
Unscrew and replace the thermocouple
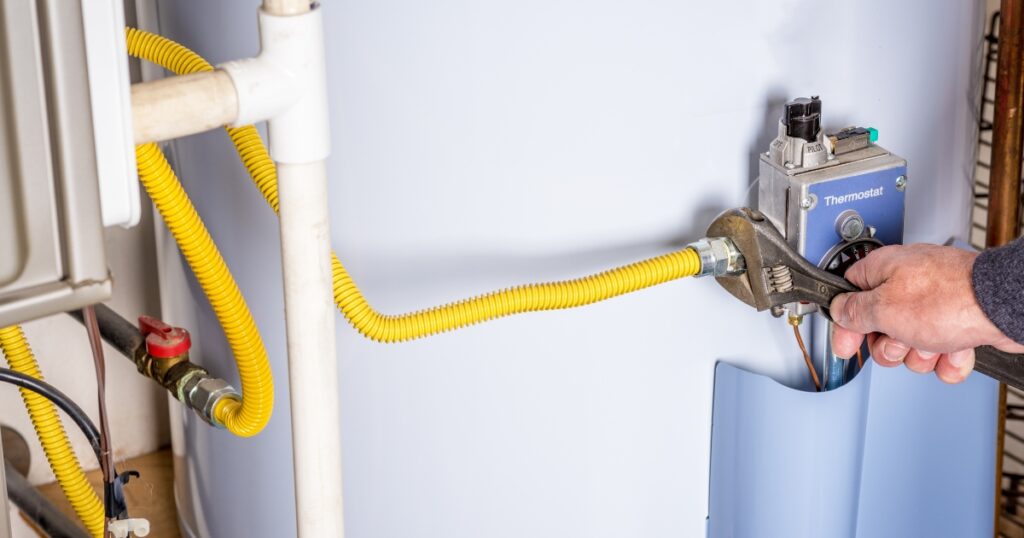
To replace the thermocouple, begin by turning off the gas and water supply to the heater. Utilise an adjustable wrench to unscrew the nut attaching the thermocouple line to the control valve.
Once detached, carefully remove the old thermocouple from its bracket. Insert a new thermocouple into place and reattach it securely using your wrench. Finally, turn on the gas and water supplies and relight your pilot light. Moving forward, we will explore how to test for leaks after re-lighting a water heater pilot light.
Test for leaks
After replacing the thermocouple, it’s crucial to test for leaks before relighting the pilot light. To do this, mix liquid dish soap with water and apply it to the joints and connections of the gas line using a brush or spray bottle.
Then switch on the gas supply and observe if there are any bubbles forming at the connections. If you notice bubbles, this indicates a leak that needs immediate attention from a professional technician.
Regularly checking for leaks is essential in maintaining the safety and efficiency of your hot water heater. By performing this simple test after replacing components or conducting maintenance, you can ensure that your appliance operates safely without any gas leaks compromising its performance.

How to re-light a furnace pilot light
To re-light a furnace pilot light, shut off the furnace and gas. Wait 5 minutes and turn the gas to “pilot”. Then hold the reset button and press the igniter.
Shut off the furnace and gas
Turn the furnace and gas off to ensure safety.
This step is crucial before attempting any maintenance on the pilot light. It prevents any potential hazards or accidents while you work on relighting the pilot light.
Always remember to shut off both the furnace and gas when dealing with pilot light issues for your own and your home’s safety.
Wait 5 minutes and turn the gas to \”pilot\”
After waiting for 5 minutes, we need to turn the gas to “pilot.” This gives the gas time to dissipate, ensuring that there’s no risk of a sudden flare-up when relighting the pilot light.
Turning the gas to the “pilot” position allows us to safely ignite the pilot light without any unexpected ignition.
After completing this step, we can proceed with holding down the reset button and pressing the igniter to relight the furnace pilot light. Remember always to practice caution when dealing with gas appliances for safe and efficient operation.
Hold the reset button and press the igniter
Once you’ve turned the gas to “pilot,” the next step is to hold down the reset button and press the igniter. This will ignite the pilot light, allowing your furnace to function properly.
If it doesn’t light after a few tries, wait a few minutes before attempting again.
If you continually experience difficulties lighting the pilot light, it’s best to consult with a professional for further assistance. Remember that safety should always be a priority when dealing with gas appliances.
How to prevent pilot lights from going out
Regularly clean and maintain the thermocouple to ensure it’s functioning properly. Proper ventilation is also important to prevent any issues with the pilot light. Check for leaks on a regular basis to catch any potential problems early on.
Want to learn more about how to keep your pilot light running smoothly? Keep reading!
Clean and maintain the thermocouple
To keep the thermocouple functioning properly, wipe it clean with a soft cloth to remove any dirt or debris. Regularly inspect for any buildup and gently use a small brush to clear away any accumulated dust or grime.
Ensure that the area around the thermocouple is free from clutter and obstruction.
Keeping the thermocouple clean is essential for ensuring its proper operation and longevity, which in turn helps maintain the efficient performance of your hot water heater or furnace.
Ensure proper ventilation
After cleaning and maintaining the thermocouple, another crucial step to prevent pilot light issues is to ensure proper ventilation. Adequate airflow around your water heater or furnace is essential for efficient combustion and safe operation.
Blocked vents can lead to poor air quality, inefficient burning, and potentially dangerous carbon monoxide buildup. Regularly check for any obstructions such as debris or nesting animals that could impede proper ventilation.
Proper ventilation also helps protect the surrounding area from heat damage by allowing hot air to disperse efficiently. Periodically inspect the vent pipes and exterior openings to ensure they are clear of any blockages or damage.
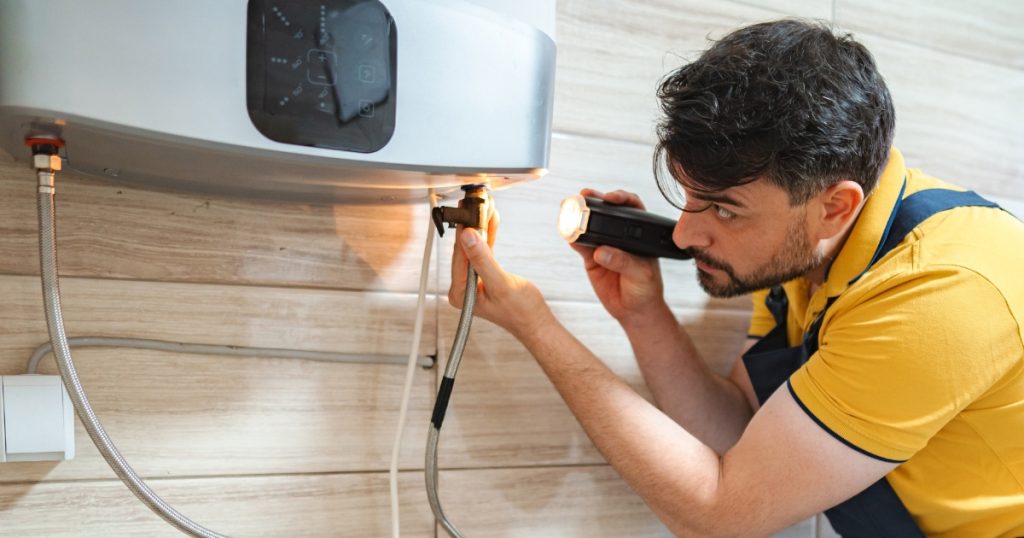
Regularly check for leaks
To ensure the safe and efficient operation of your hot water heater or furnace, it’s crucial to regularly check for leaks. A simple way to do this is by visually inspecting all connections and fittings for any signs of moisture or corrosion.
Additionally, make it a habit to listen for any unusual hissing sounds near the gas line and smell for any distinct rotten egg odours, as these could indicate a potential gas leak. In case you detect any leakage, immediately turn off the gas supply and seek professional assistance to address the issue.
By being proactive in checking for leaks on a regular basis, you can prevent safety hazards and costly repairs associated with gas leaks. Regular maintenance not only ensures your equipment’s longevity but also provides peace of mind knowing that your home appliances are operating safely.
Restoring Proper Operation
In summary, restoring a hot water heater pilot light to proper operation is essential for ensuring a consistent supply of hot water. Regular maintenance and cleaning of the thermocouple can prevent issues from occurring in the first place.
Ensuring proper ventilation around the water heater will help safeguard against strong breezes blowing out the pilot light. Regularly checking for leaks and promptly addressing any issues can also help maintain the functionality of the pilot light and prevent unexpected breakdowns.